How Borough Bound Designs an RPG City
From ideation to final edits, here's the full process Borough Bound uses to create tabletop settlements. Please steal our ideas!

At time of writing, our team at Borough Bound has designed over 20 settlement settings for use in tabletop gaming. We hope that you incorporate these settlements into your game, whether you use the maps as a launchpad for your own worldbuilding, borrow lore nuggets from our setting guides, or fully implement the “canonical” versions of our cities. That said, we know that the majority of GMs who run homebrew campaigns aren’t just dragging and dropping content made by Patreon creators into their games verbatim. Clever GMs are borrowing and tweaking content from any source they can find, and, in many instances, you’re just making stuff up entirely!
In this article, I’m going to walk you through the entire workflow our team uses to build our settings. We want to give you a glimpse into our design process for two reasons. Firstly, we just think it’s fun to give you a peek behind the curtain. This is how we move from the ideation stage to full borough, complete with maps, music, illustrations, NPCs, plot hooks, and auxiliary content. Secondly, I suspect there’s a good amount that GMs can borrow from our workflow when you’re creating your own cities.
As we always say, making tabletop settlements is hard. You have to consider not only the content you intend for your players to interact with, but also all the background bits: lore, culture, the economy, the aesthetic, the layout, available services, a handful of NPCs, etc. Even if you’re designing a village with just one key NPC and no map, no shop, and no government, that village still has to be at least partially fleshed out. So, let’s take it from the top and explore how the BB team creates cities!
This whole article is about RPG cities, so give our RPG city playlist a listen.
Step 1: Ideate
Before we put anything to paper, the whole Borough Bound team meets in a Discord call. There, we brainstorm options for the next borough we’ll create. Sometimes, we already have some prompt that we’re working off of, particularly when we’ve conducted a Patreon Request Poll to determine the theme of the next borough. In other instances, however, absolutely anything is on the table.

The first thing we need to establish is the basic premise of a borough. Typically, this is a one-line description of the setting. Some examples from our catalog include:
- A dwarven library of cursed books carved into a snowy mesa
- A Wild West-themed crossroads town between hells
- A fake Mesoamerican temple complex meant to deceive adventurers
The key here is to figure out the gist of the setting, the seed of an idea that will inform all future decisions.
To get to that one-line descriptor, you can begin by thinking in parts. A useful descriptor is usually some combination of:
rough story hook + rough location + aesthetic inspiration
For example, our setting of Crabwell could be described as:
city with laws dictated by a magical tower + astride a river in a temperate basin + early Renaissance European
When brainstorming a city, we don’t always land on a pithy descriptor like those above. Instead, we start with just a vague concept we want to explore. When we were brainstorming what would become Falthringor, the only thing we knew we wanted for sure was some sort of castle. From there, we started asking questions. Who lives there? Who built it? What sort of castle? Is it magic? Where is the castle? Why build a castle there? What do the inhabitants eat? What are they defending against?
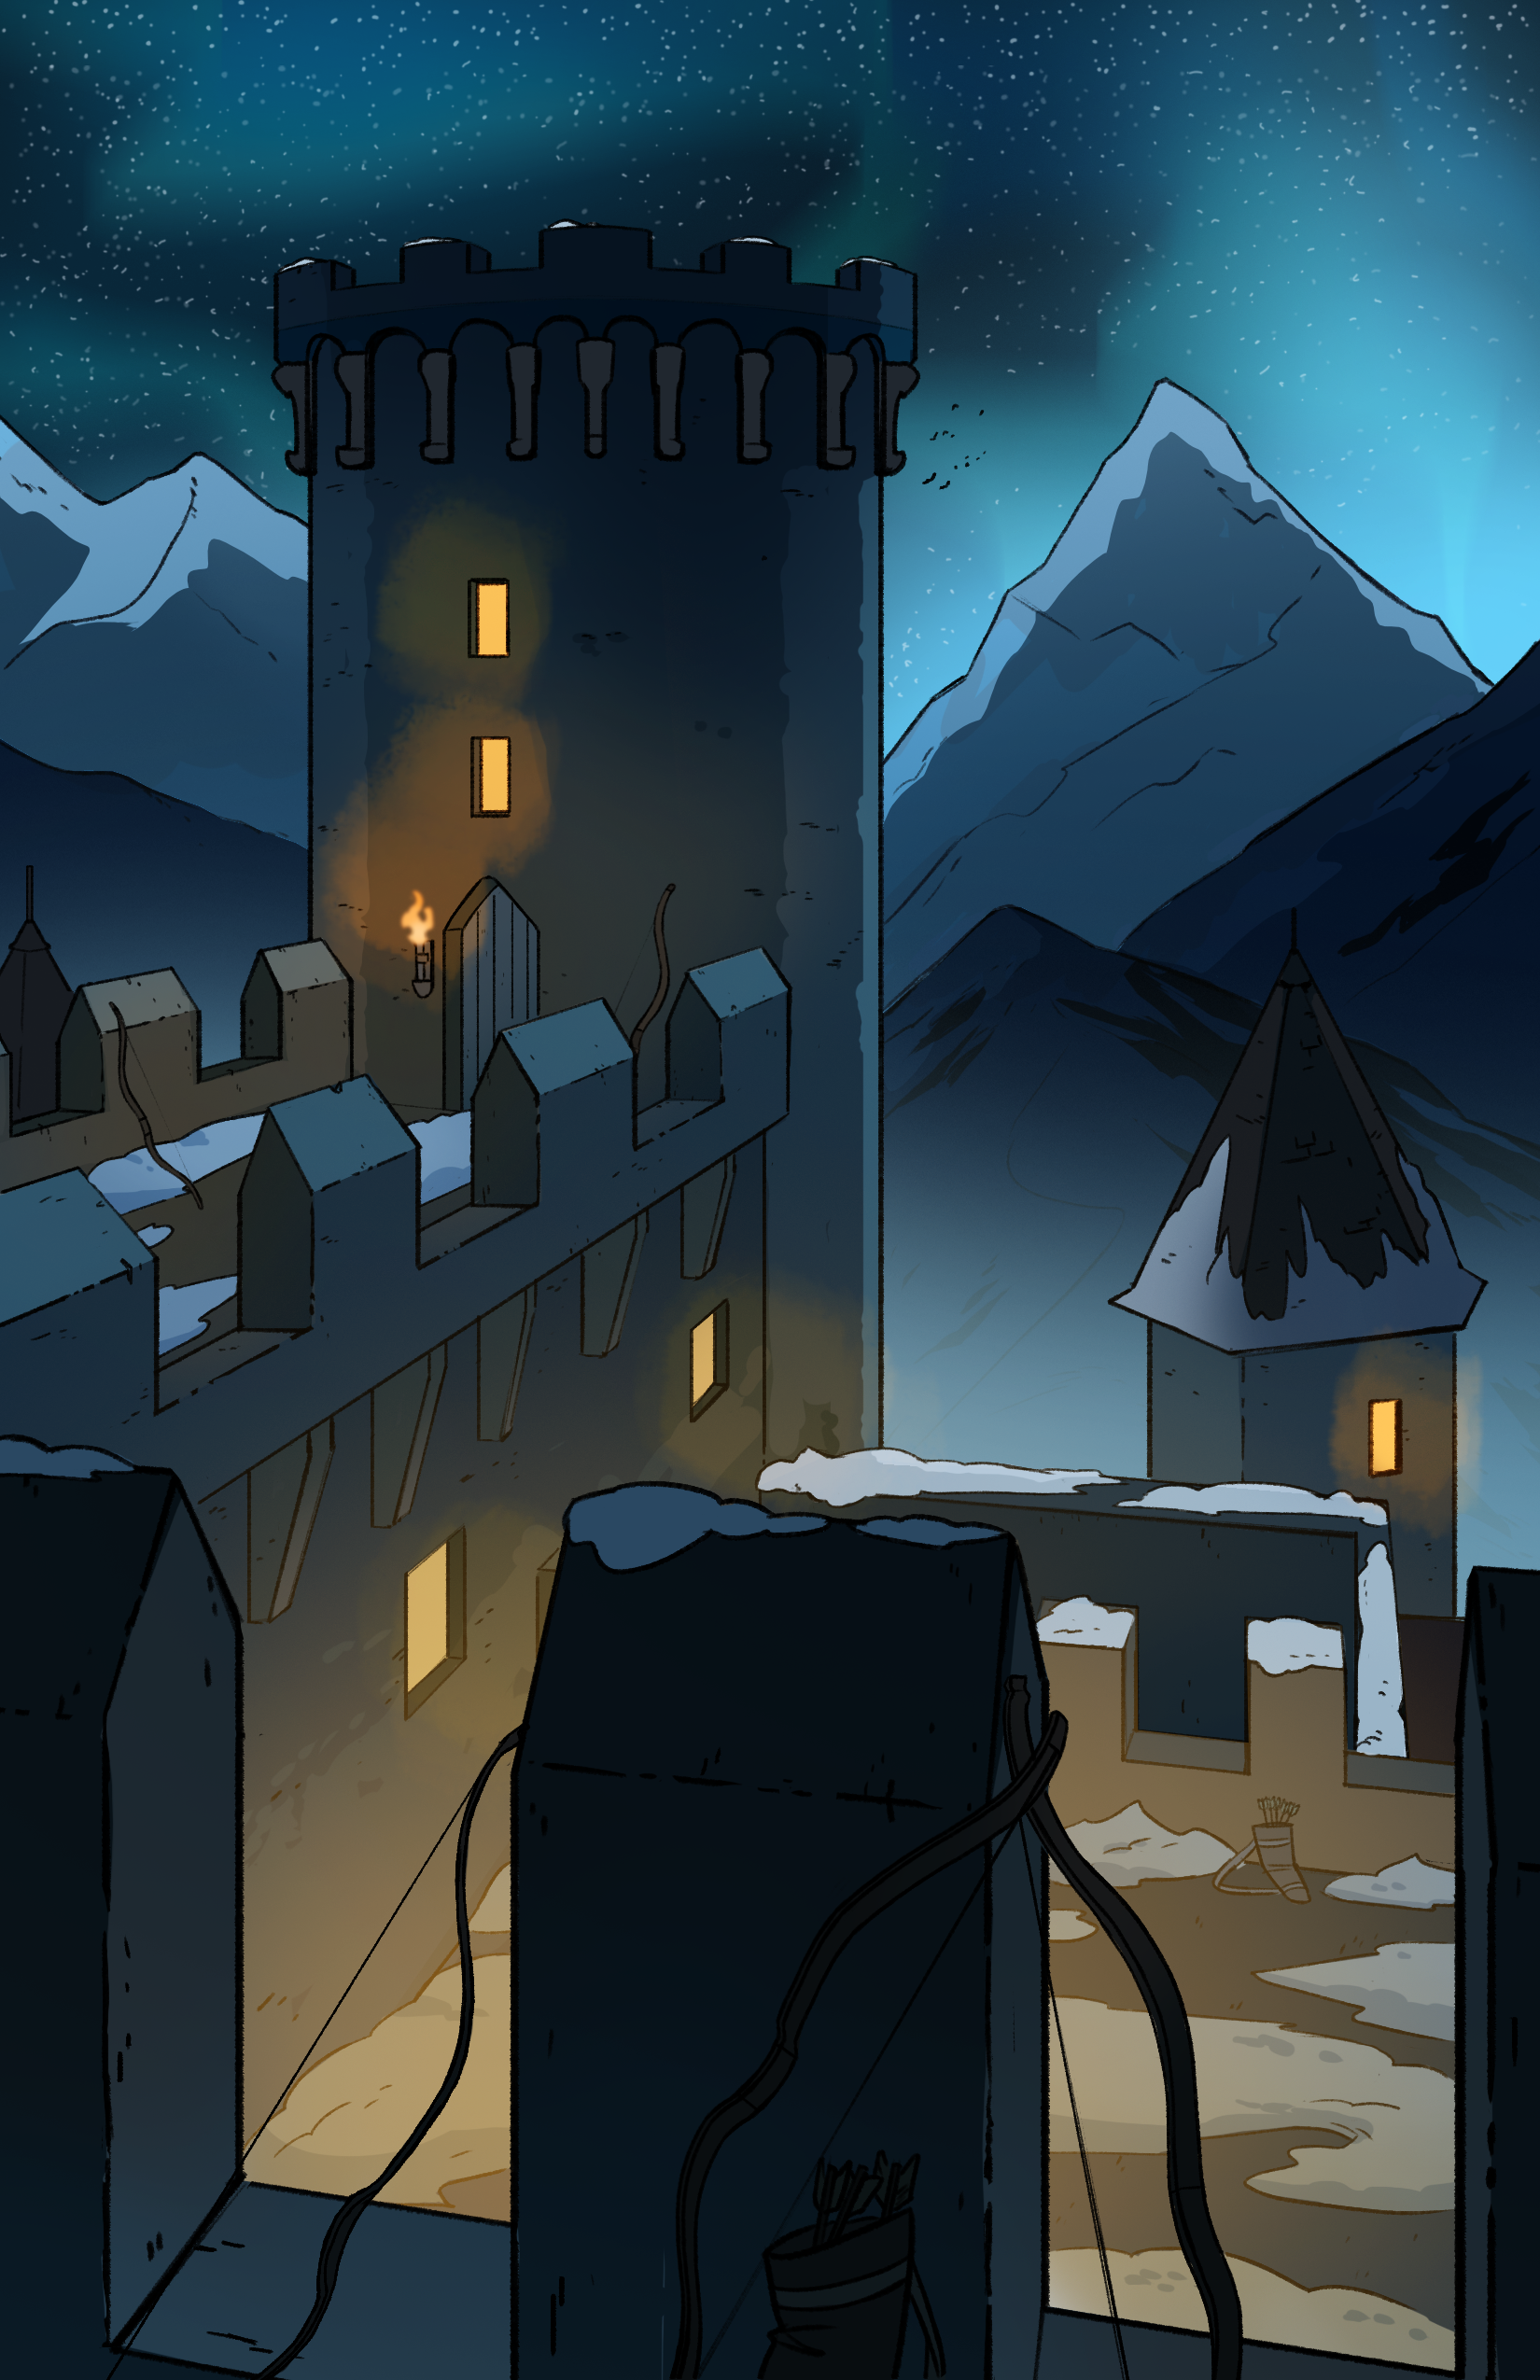
By starting with the thing you want and then workshopping the concept iteratively, you don’t necessarily ever end up with a concise one-line description. For example, we usually subtitle Falthringor “the snowy mountaintop citadel,” but that doesn’t really get the whole idea across. Instead, this concept + question process will yield a premise that becomes equally fleshed out down the line, but perhaps without that single, perfectly encapsulating logline.
GM Takeaway: The first step for us is identical to the first step for you. When planning a city, you have to decide the shtick before doing anything else. The specifics will necessarily depend upon your campaign world, but I think you’d be surprised how much wiggle room your players will give you. Not all cities need to be gimmicky, but they should have one or two defining traits, even if it’s something as simple as “city with a coliseum” or “city of gold.” In either case, this is not the time to limit yourself. Don’t feel boxed in. Get creative. You can always edit and refine at later steps.
Step 2: Brainstorm Points of Interest / Narrative Hooks
Once we have the general idea of a setting, the next step is to brainstorm what noteworthy places exist in this setting and what noteworthy things are happening there. We usually don’t think exactly in these terms; instead it’s just a sort of brainstorm free-for-all as we continue fleshing out the basic idea. POIs (points of interest) and general plot beats just happen to be the main details we are trying to generate.
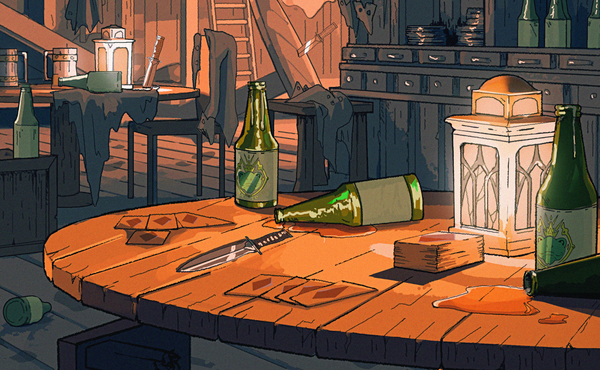
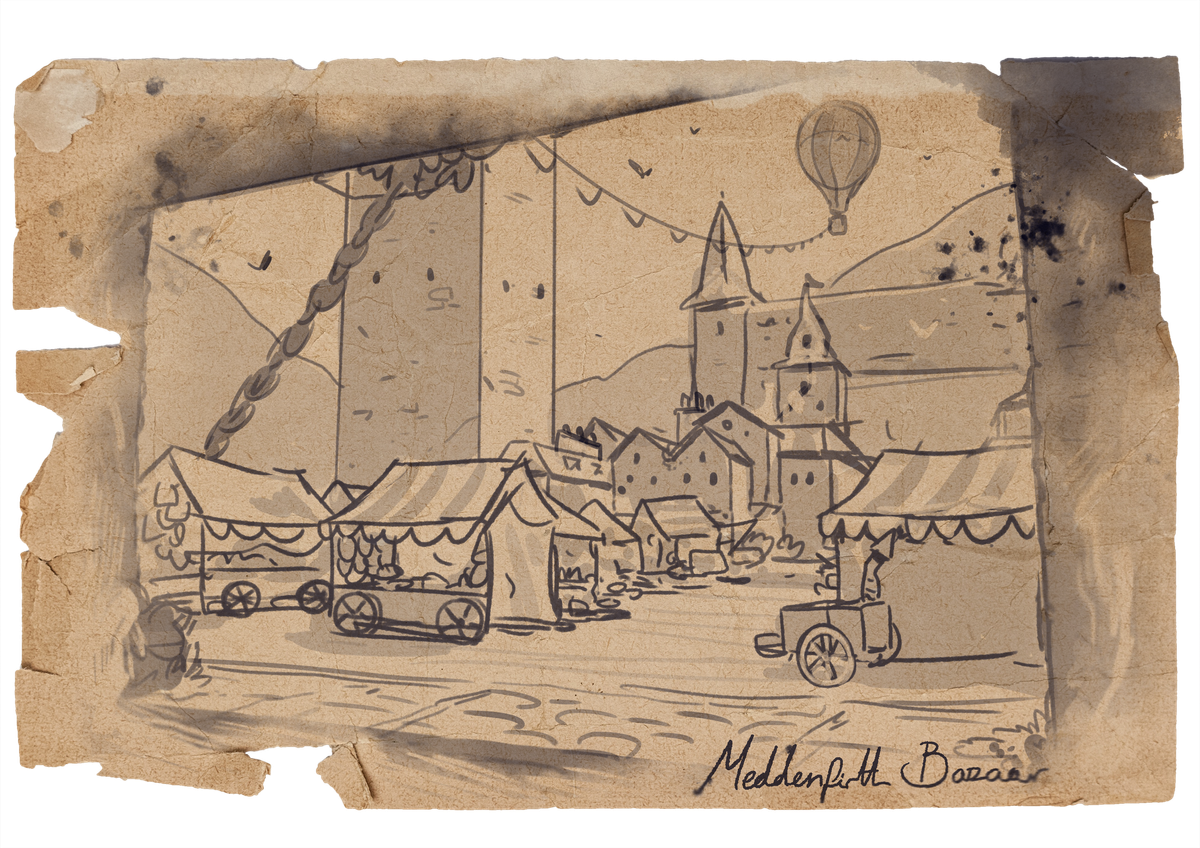
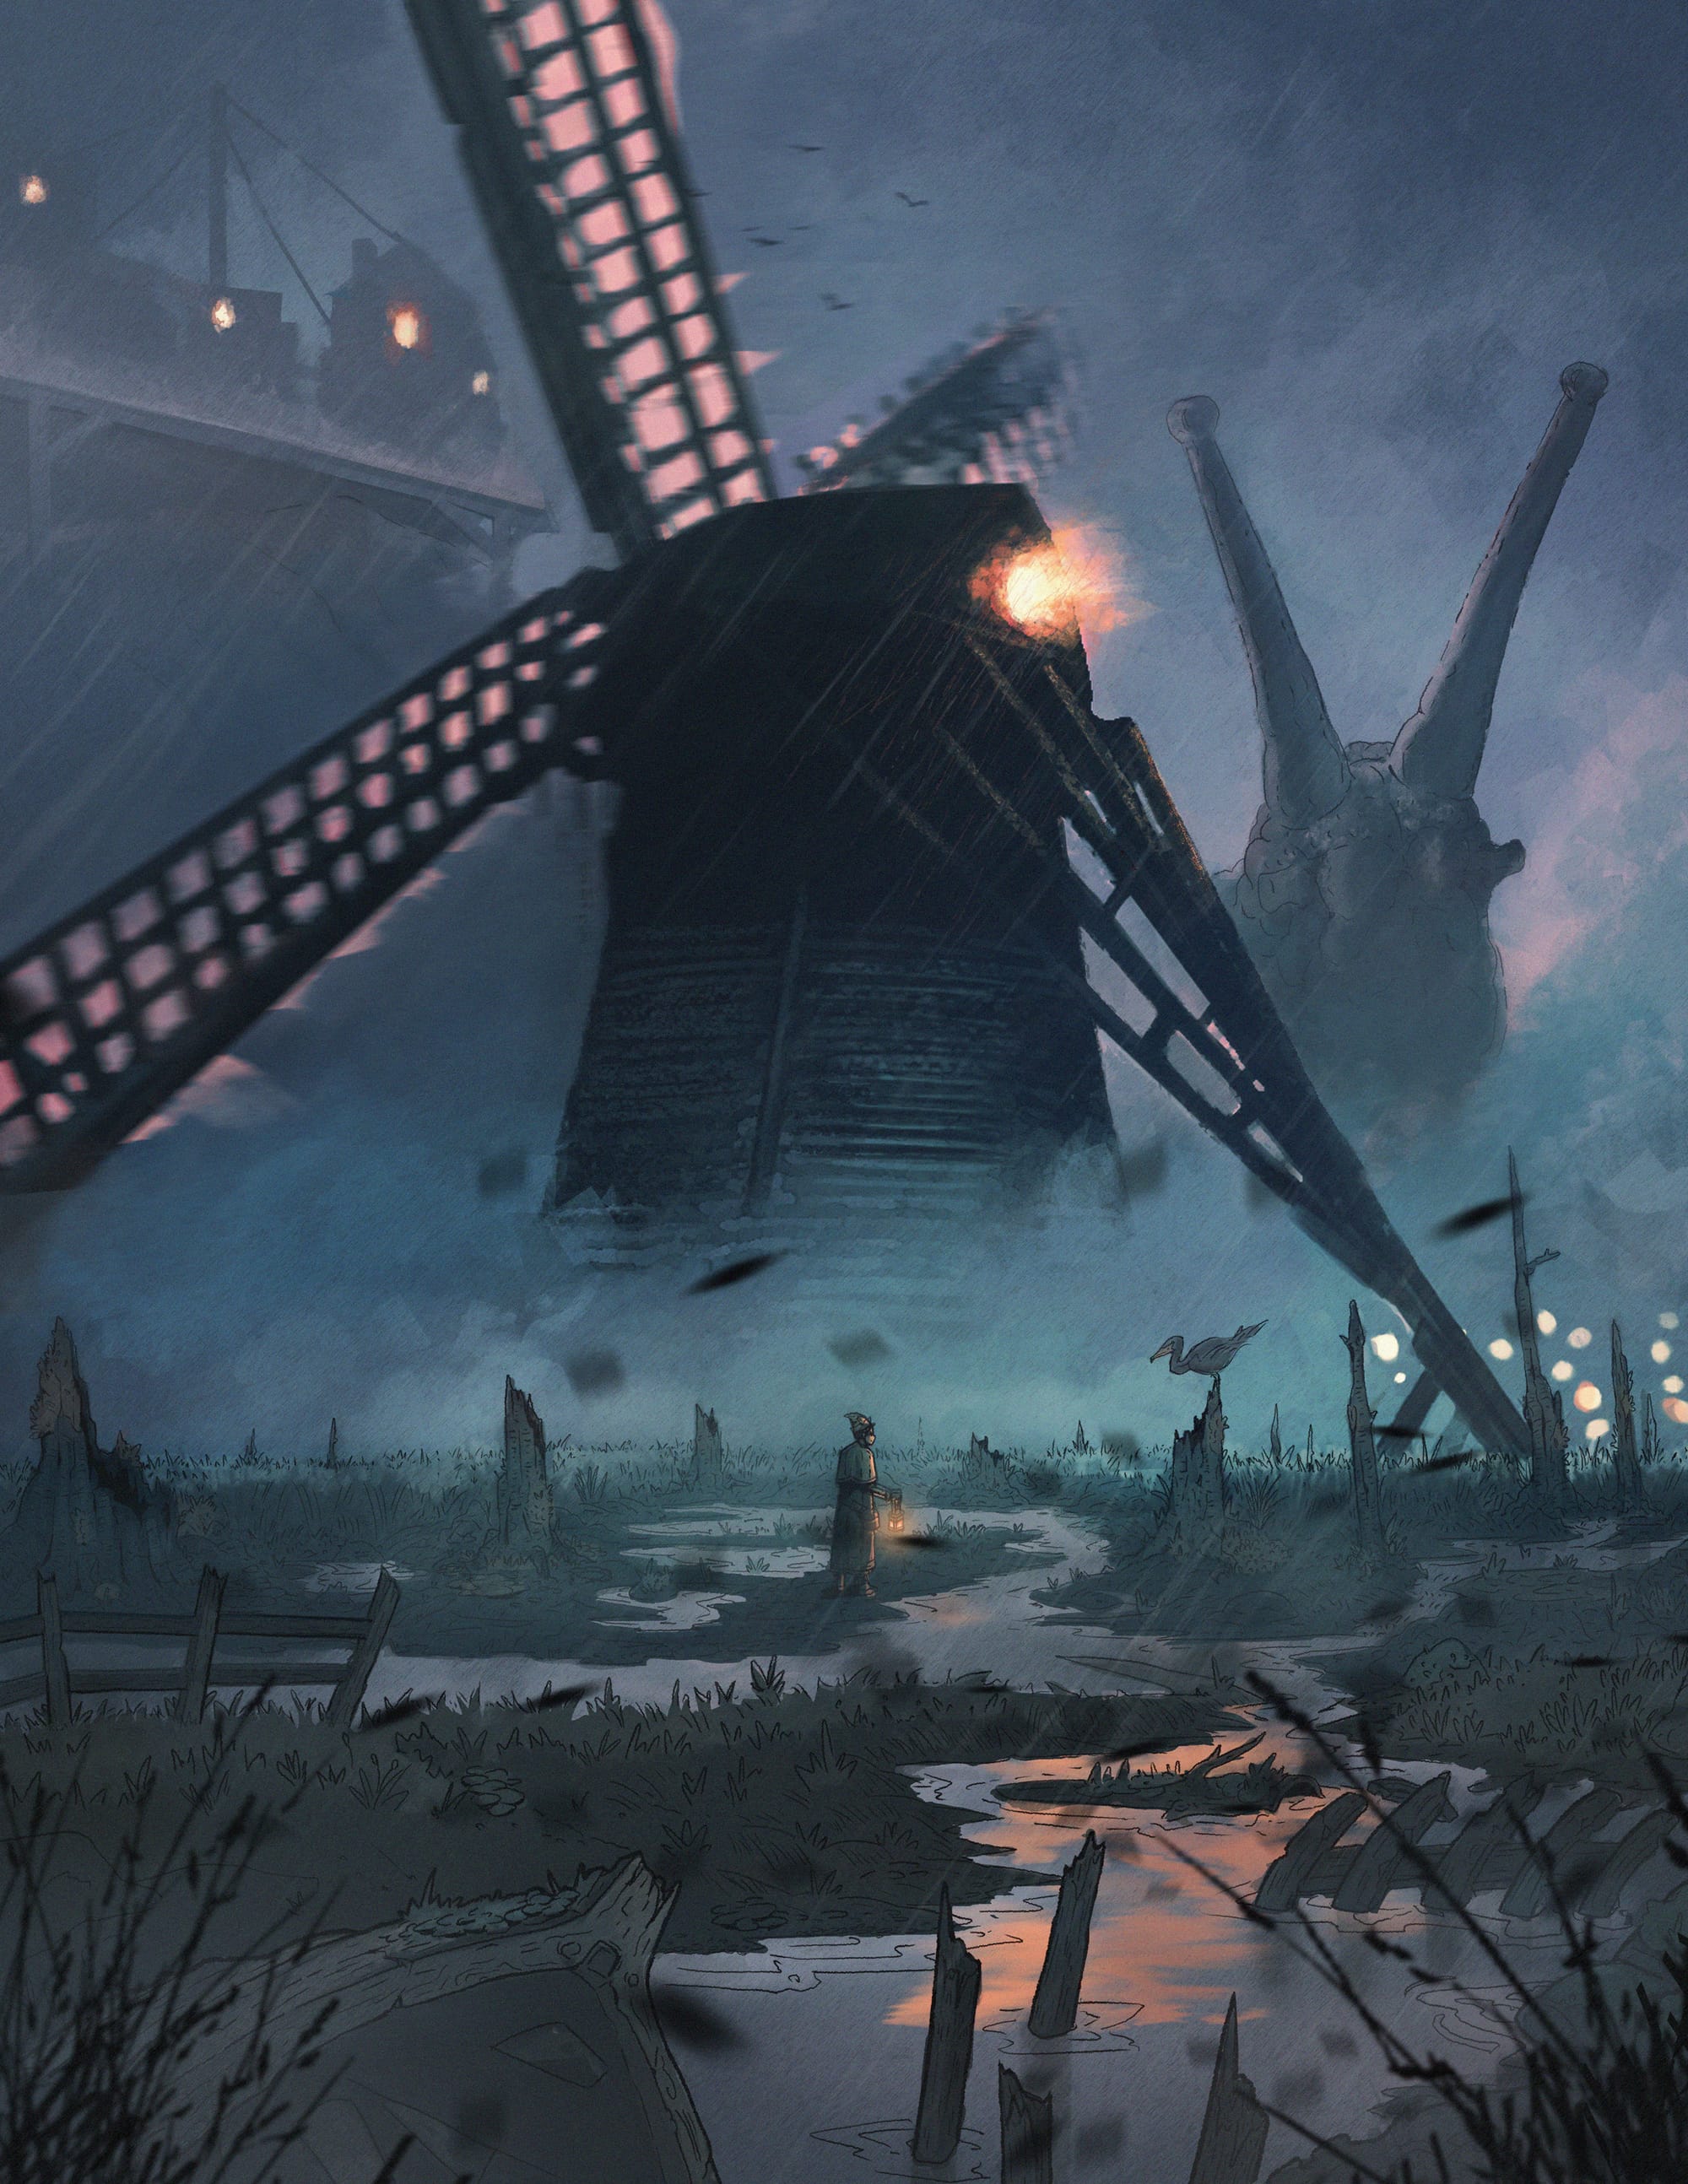
Let’s talk about our setting of Thestwick. This is a village in a misty fen. The initial idea was just that people living in a fen were experience rapid climate change as the fen was drained; our former team member Cze had just been to a windpump in Norfolk, and that was our jumping-off point. That’s a great concept, but we still had to populate the setting with noteworthy locations and events. POI #1 was the windpump, essentially a great big windmill that pulled up water and sent it elsewhere. POI #2 was a fallen tower. There was no particular reason for including this, but we liked the visual of a toppled tower resting in the peat. Someone suggested the idea of “cormorant fishing” as a quirky concept to incorporate, so we added an aviary as POI #3.
We also wanted Thestwick to be “haunted,” so as to evoke a quasi-fairytale vibe. Thus, we tried to generate ancillary threats for the village: a black dog in a bone mill, a troll in a cave, a witch on a giant snail, and an undead knight in the toppled fort. There were basically no bad answers here. We just wanted to come up with quirky dangers that would be inspiration for our collaborators and would fuel adventures in Thestwick.
A compelling RPG city has cool places to go and interesting things to do there. That’s what this step is all about.
GM Takeaway: This is probably the most important part of the process. Even if you come up with something fairly rote and traditional in Step 1, you can always add heaps of intrigue by just chucking loads of interesting THINGS and HAPPENINGS into your city. Does the city have a weird church? the husk of a dying god? is there a festival filled with ghosts? is this city at war? is there a meteor shower? did a space rock hit a tower?
Just start putting ideas in! They don’t have to be related to whatever plot you’re telling. You just need to add intrigue and flavor to your world. Most tabletop settings are, essentially, collections of interesting people, places, and things in close proximity. This is the step where you generate those ideas.
Step 3: Consolidate Ideas
Once we have a rough concept for the borough plus a handful of neat things to put in it, we end the all-hands meeting. At this point, we can begin amalgamating all of the ideas for reference later.
- We start a “Brainstorm” channel in our private Discord. Here, anyone can post aesthetic inspiration (for outfits, color palettes, architecture, geography, etc), or we can continue to flesh out tricky details about the concept (fill in plot holes, elaborate on the weirder elements).
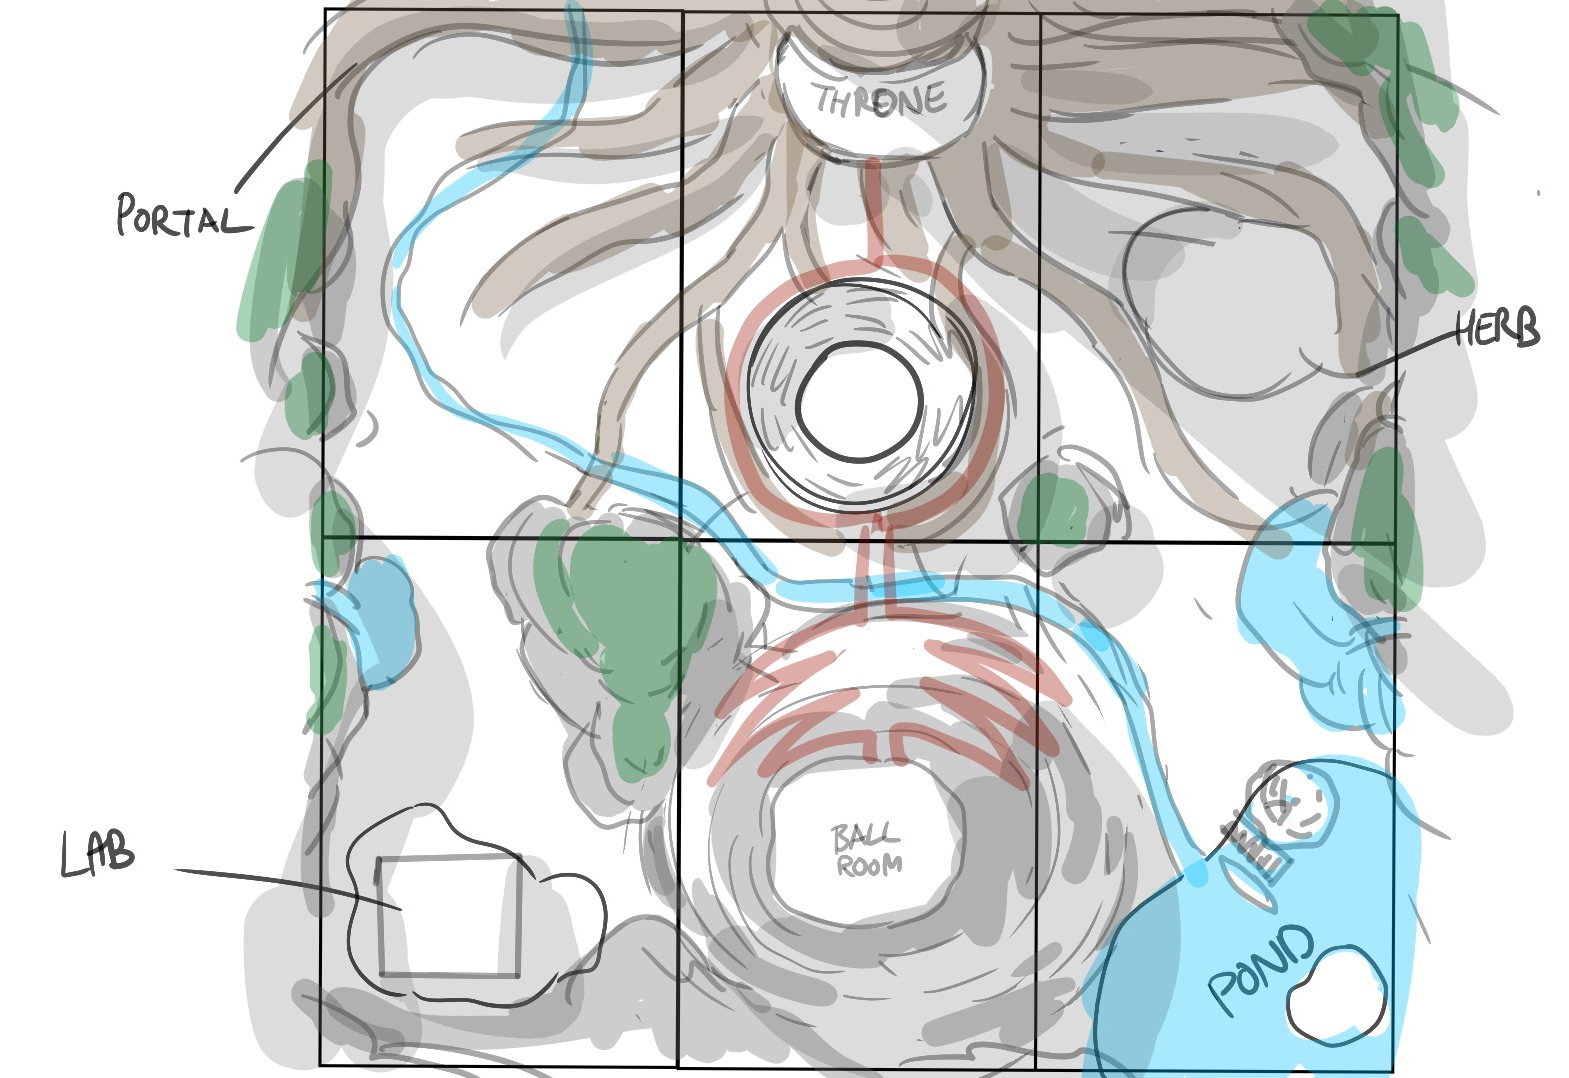
- Our art director James and I meet to sketch out the most basic possible version of the setting’s map. This is just a black and white MS Paint-ish rendition where we determine the rough arrangement of POIs, the contours of geographic features, and the overall shape language of the setting. Since we release our settings in sequential bundles of content, this meeting also clarifies the order in which we will unveil content.
- James—and sometimes our PDF designer Jelke—will start putting together mood boards on Pinterest filled with aesthetic inspirations.
- I write a one-page “brief” of the setting, summarizing the key elements. This also includes a list of each Patreon release and what content each will include. This is mostly an outline for the borough guide, but it is also broadly a roadmap for the whole team.
GM Takeaway: If you’re making a city for your home campaign, this step will look pretty different. You won’t be collaborating with an art team and gathering inspiration in a Discord. That said, you probably should take some time to assemble all of your thoughts after you complete your initial brainstorm. It’s all well and good to have a list of ideas on a piece of paper, but finalizing the list of elements you’re committing to can be incredibly helpful as you start generating the actual content.
Step 4: Generate Content
With ideation and summarizing behind us, we can now begin working on our individual responsibilities, creating the “deliverables.” For a given release, the Borough Bound workflow looks like this:
- I write a chapter of the borough guide. This includes writing plot hooks, describing NPCs, creating rollable tables, explaining any necessary background lore, and providing useful information about the POIs.
- I meet with James to discuss how we will depict this content in map and illustration form, deciding in particular what additional maps and illustrations the team will create. I then write prompts for all of our artists.
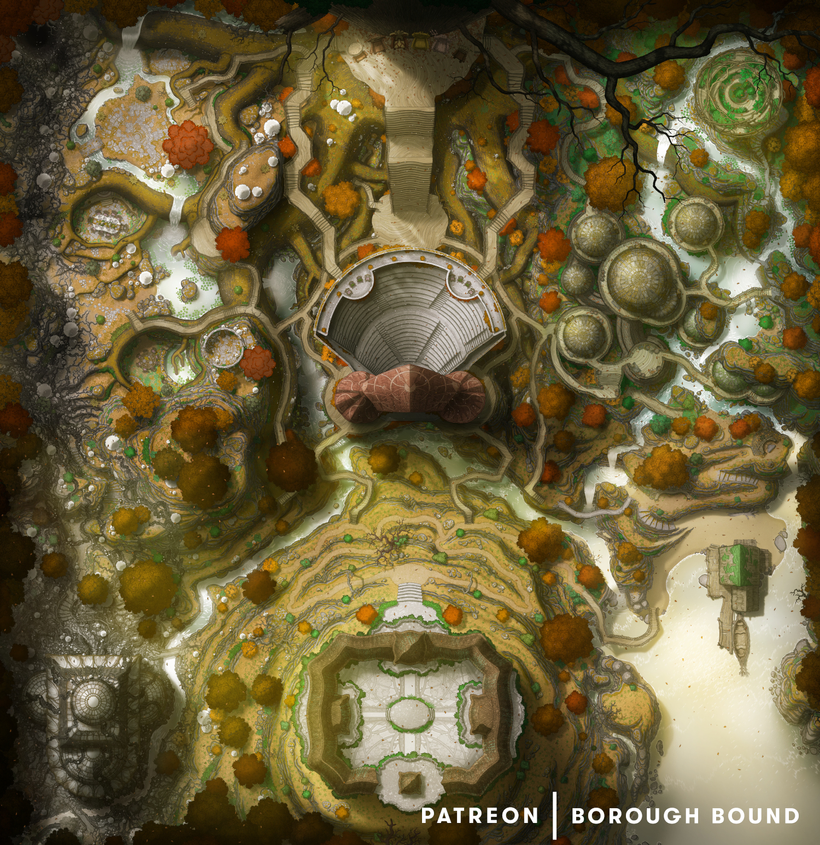
- James creates the primary exterior map, using my prompt and the initial sketch as guides. He does his best to make the visual representation of the setting match the established lore. He also focuses on making a map that is both tactically compelling and visually engaging.
- I write music that is either emblematic of a character or location, meant to accompany some particular plot beat, or simply matches the atmosphere of the setting. By the end of a borough, I should have a full EP/album of music to release.
- Once James completes the primary exterior map, Matt designs the interior maps for key locations. He collaborates with James to establish a cohesive visual language, and he checks with me to ensure that the map includes plot-relevant assets and fits the needs of any quest.
- Amber creates the map variants. These are a combination of canonical variations (altered weather, special events, or visually distinct times of day) and totally out-of-the-box reimaginings of the setting.
- Meanwhile, James creates illustrations for the borough guide: a mix of NPCs, scenes, items, diagrams, and in-universe documents.
- Lethe edits my chapter for grammar, sensitivity, and light content tweaks.
- Once all of the maps, illustrations, and document edits are done, Jelke lays out the borough guide in InDesign. James and I make suggestions and edits to ensure the document nails the aesthetic while maintaining legibility.
- Ryan makes promotional images for us to share on our Patreon and social media.
Once all of these tasks are completed, I bundle up the content into zip files and upload everything to Patreon, write some copy, and then release it to patrons. Keep it in mind that this is the process for one “batch” of content for a borough. Most boroughs consist of 4 such batches before the Definitive Edition (see below), but some have as few as 2 or as many as 12. Fleshing out a city is an iterative process, and it helps to finalize one piece before moving on to the next.
GM Takeaway: The lesson for other GMs here, I think, is quite simple. Build the things you need in batches. If your party is heading to the market next session, flesh that out with whatever details you need before figuring out the specifics for the port, barracks, slums, etc. It is totally fine to finish whatever it is you plan to actually create for your setting (lists of NPCs, sketch of the map, rollable tables, whatever) in batches. This is especially true if you already have a broad summary of the setting generated in Step 3.
Step 5: Edit and Finalize
Once we’ve release all of the primary parts of a setting, the team returns to the setting for one final “Definitive Edition” push. This is when we stitch together the map and clean up any rough seams, finalize the full borough guide PDF with a table of contents and one more batch of edits, and then generate any highly requested side content or bonus goodies. I’ll usually reach out to a few collaborators to contribute useful auxiliary assets (maps, magic items, music, etc.) to help flesh out the setting with content that is “canonical enough” to fit in with the rest. This is also the part of the process where Ryan and Jess assemble VTT tokens and build the Foundry module.
I then release one final post for the setting, pointing patrons to all of the completed content. Once that’s done, we can begin publishing the content on other platforms. We put maps on Roll20, PDFs on itch.io, music on streaming services, and the Foundry module on The Forge. Now, at long last, one borough is complete. Time to schedule another all-hands meeting and start planning the next one.
GM Takeaway: There’s a limit to how much prep time you can allot yourself for a given campaign. You may not have time to comb through all your work and make tweaks before the start of a session. You should still at least reacquaint yourself with what you’ve generated as a refresher and to try to determine whether anything needs alterations.